There are two methods we use to manually upload DICOM image sessions:
- Compressed Image Uploader
- XNAT Desktop Client
Compressed Image Uploader
Uploading MR (DICOM) images can be done directly in your browser.
- Ensure your DICOM image folders are together in a parent session folder, then zip the parent session folder.
- Navigate to https://xnat.camh.ca in your browser.
- From the home page top bar, select "Upload" >> "Images" >> "Compressed Uploader"

- Select your "Project" from the drop down menu, then ensure "Prearchive" is selected and click on "Choose File" to select the file containing your DICOM images that you zipped in step 1. Finally click "Begin Upload". This may take a several minutes depending on the size of your session.

- Once the image upload is complete, navigate to the prearchive by going to the top bar "Upload" >> "Go to Prearchive"

- Now, we need to make sure the metadata for the upload is set correctly (particularly the subject and session names). These should be automatically generated correctly from the DICOM headers, but if a mistake is made at the scanner, you can correct it in XNAT. This is done from the prearchive. From the top bar, select
upload, thengo to prearchive.
- This screen contains all pending scans. The metadata for this upload is visible in the top right hand corner. Any data here is NOT accessible from the main database and will not be analyzed by us. You must make sure this data is reviewed and archived so that it can be properly analyzed, by simply selecting a series and clicking
review and archive.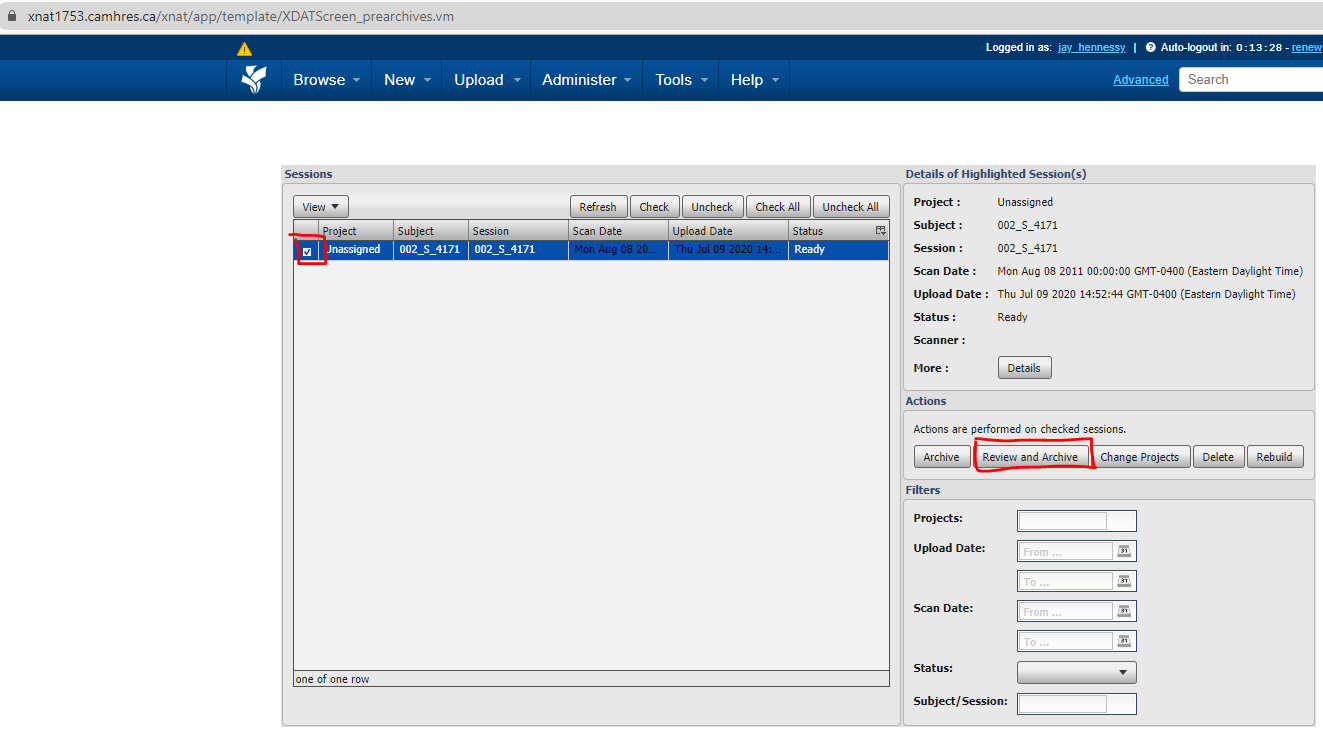
- Recall that, in our database, the subject and session name must match exactly and should must follow our naming convention. You can do that here by either adding a new subject editting the subject/experiment label (if need be), adding / editing the other session parameters (optional).

- Finally, at the bottom, select
submit. Your data should now be available in the archive and appear on the main page under ‘recent data activity’.
XNAT Desktop Client
The XNAT Desktop client is a tool created by XNAT that you can download to your local computer that gives you a local user interface to upload files to XNAT.